How Plumbers Use Cameras to Find Leaks and Moisture in Structures

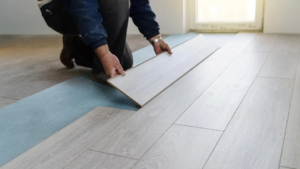
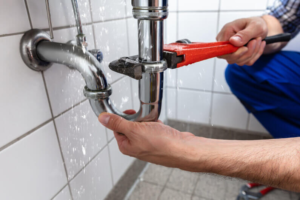
Plumbers Lexington work on plumbing systems that take away waste water, provide hot and cold running water, and regulate indoor climate. They install and repair these systems in homes, buildings, and public facilities like hospitals.

Plumbers

A plumber needs to have excellent customer service skills and a good understanding of industry practices and building codes. They also need to be physically strong and have good manual dexterity.

A leak detection system is a device that meticulously tracks the water flow through a pipe, then shuts off the water supply in response to any changes. This type of device is designed to give homeowners peace of mind and protect their homes from catastrophic damage and jaw-dropping repair bills.

These devices typically have sensors that are wired to a valve along the water line. Once the sensor detects water, it closes the valve, cutting off the flow of water to the system. These systems can also be installed on appliances like water heaters and dishwashers, to prevent water waste.

There are several types of leak detection technology available, including LiDAR (light detection and ranging), a powerful laser-based technology that can create high-resolution maps of areas with accuracy. It’s capable of detecting structural changes and locating leaks with a great deal of detail, making it an extremely valuable tool for plumbers.

Another type of leak detection is sonic, which uses sound to locate the source of a leak. This technique is able to detect the distinct noise that escapes from a leaking pipe under pressure, which sounds like a hissing or whooshing sound. It’s a highly effective tool for finding leaks in hard-to-reach places, such as under concrete slabs.

Leak detection systems can also be installed on pipes that are at risk of freezing, as they are able to detect when water temperatures drop below freezing levels. This can prevent costly plumbing repairs and potential flooding when the pipes thaw out.

Regularly checking for wet spots around the home is a good way to spot leaks, as it’s often an early warning sign of a problem. If you notice a damp spot on the floor or walls, it’s a good idea to contact a plumber for an inspection. It may save you a costly repair bill, or even more catastrophic damages like mold and mildew. Be sure to check your water heater periodically, and be on the lookout for puddles near your dishwasher or refrigerator’s ice-making unit. These could be signs of a slow leak or a major burst pipe that’s causing extensive water damage.

LiDAR

Light detection and ranging (LiDAR) is a measurement technique that uses lasers to scan structures. It works by bouncing laser light off the surface and measuring the time it takes to return to the sensor. This information can be used to determine the distance of the scanned structure. LiDAR technology has been used as a compliment to CCTV for the inspection of sewer pipes as part of trenchless rehabilitation projects.

Unlike CCTV that produces an illuminated “ring” around the pipe, a LiDAR survey produces a continuous 3D point cloud of the entire pipe wall. This allows for a more accurate assessment of internal diameter and material loss. This information is also useful when evaluating the effectiveness of a sewer pipe rehabilitation project.

When paired with a gyroscopic alignment, a remote LiDAR survey can provide a full 3D model of an underground pipe. This information can be compared to the original As-Built drawings to detect any deflections that may have occurred. This allows municipalities to accurately forecast capital improvements and prevent costly surprises down the road.

LiDAR technology has been used in a variety of different applications, from agriculture to archaeology to autonomous vehicles. However, few studies have focused on terrestrial LiDAR data to detect, model, and analyze buried infrastructure in an unstructured industrial environment. This is largely due to the challenging nature of registration, the sparseness of the point clouds, undue clutter from vegetation or dirt/rubble, unforeseen occlusions, and indiscriminating surfaces.

Thermal Imaging

As the name suggests, this type of camera detects thermal radiation, which is invisible to the human eye. The camera then converts the thermal energy into a visible light display. This allows plumbers to see where there may be leaks and moisture penetration in structures without having to break walls or make a mess. It also helps to find the source of a problem, so that it can be quickly repaired and avoid further damage.

The cameras can be used to spot a range of problems, including overheated equipment and insulation failures. They can even identify water leaks hidden behind walls and under floors. This makes them particularly useful for plumbing predictive maintenance inspections, as they can identify potential problems before they cause major damage.

A clogged drain or water leak can have serious consequences for a building or structure, but they are not always easy to locate. The infrared imaging technology built into many of these cameras can show where the problem is located, making it easier to pinpoint the source of the issue and get it fixed as soon as possible.

These devices can also help to save money on repairs by avoiding unnecessary excavation and demolition. For example, if a pipe has a clog and is causing water to overflow from a sink or toilet, it can be very expensive to tear up an entire room to find the source of the problem. Infrared imaging can identify the exact location of the clog or leak and prevent the need to destroy large sections of the property to find it.

If a leak or clog is caused by water or moisture penetration, a plumber can use the infrared imaging camera to see where it is in a wall or ceiling, so that the correct repair materials can be used. It is especially useful for locating leaking water in walls or underneath flooring, where it can be hard to reach.

A basic model of a thermal imager can be bought for around $230. This model will allow a plumber to see blocked pipes and heating pipes behind plaster walls, as well as water leaks under a concrete floor. It is not a substitute for a full home inspection, but it can be a valuable add-on service and provide added peace of mind for a homebuyer.

Infrared Cameras

A thermal camera (also known as an infrared camera, thermal imager, or IR camera) creates an image by recording infrared radiation as it is emitted from an object. The image is then displayed on a screen, similar to the way a normal digital camera works. Thermographic cameras are generally divided into two categories: cooled and uncooled. Cooled infrared cameras capture more of the infrared spectrum than their uncooled counterparts, which gives them superior image quality.

The infrared sensor inside a thermal imaging camera contains thousands of pixels that respond to the infrared energy focused on them by emitting an electronic signal. The sensor’s processor analyzes these signals and assigns them a temperature value for each pixel. The resulting matrix of colors is sent to the camera display and produces the final thermal image. Some cameras use a color palette to help technicians interpret the images and locate problem areas more quickly.

While the images produced by an IR camera may be monochrome, some models can also produce a pseudo-color display by using density slicing to highlight areas of interest. This technique combines multiple pixels and assigns each of them different intensities to display the information in an easily digestible manner for humans.

An infrared camera can detect a variety of objects that radiate heat, including humans and other warm-blooded animals. The technology is used by veterinary and animal health professionals to identify infection and illness, as well as by electrical contractors and building inspectors to detect deterioration and other dangers.

Most IR cameras come with software that enables users to perform basic image analysis and generate reports. Those with additional features such as voice annotation, automated functions, resolution enhancement, and Wi-Fi or Bluetooth connectivity can streamline the process of recording and analyzing thermal images. These advanced capabilities open the door for more efficient and customizable IR inspections, as well as predictive maintenance programs. In addition to reducing the time needed for a repair job, these tools can also help reduce costs by identifying problems before they become more serious. As the technology continues to improve, it is likely that more plumbers will adopt IR imaging into their workflow.

Choosing the Right Flooring for Your Home

Flooring is one of the most important decisions when remodeling your home. It affects both the look and function of each room.

As innovation brought in new materials, flooring styles and installation options expanded. Today, homeowners have many choices in floor coverings that range from traditional hardwood to eco-friendly laminate. For more information, click the Visit Website to proceed.

Wood floors were a popular choice during the housing boom of 2000 through 2005 when home values rose significantly and people could afford to remodel. Wood flooring can add a rich, traditional look to any space. It is durable, timeless and easy to clean. The natural material of wood can be stained or painted to complement any decor.

The type of wood flooring chosen depends on a number of factors, including price, hardness and color. Harder woods are more expensive, but they can withstand a greater degree of damage from furniture and other household items. A wood floor’s hardness is determined by its Janka hardness rating. This is based on how much force is required to push a steel ball halfway into the wood. Maple and hickory have the highest Janka ratings, while southern yellow pine and other softwoods have lower ones.

Once the hardwood is harvested, it is dried in a kiln or by air before being milled into boards. The boards are either packed unfinished for a site-finished installation or prefinished at the factory. Factory-finished wood has a higher quality finish and can be refinished more easily than a site-finished floor.

Besides being a beautiful, durable flooring material, solid wood is also environmentally friendly and renewable. It is considered a sustainable building material and earns points under the Leadership in Energy and Environmental Design (LEED) program, a green construction rating system. It is also easier to recycle than other flooring materials.

In addition, many manufacturers offer reclaimed wood, which adds a unique touch to the room. It can include character marks such as scars, gouges and knot holes. Reclaimed wood is available in a variety of species and finishes.

If you prefer the look of natural wood, you can choose to have your floor finished with a natural oil, hardwax or urethane. Natural oils penetrate deep into the wood and are repairable, but require more frequent reapplication. Hardwax and urethanes form a tough protective coating over the surface of the wood and are easier to refinish, but they do not protect as well against damage from furniture or pets.

Tile

Tile flooring is a versatile and beautiful option that works well in any room of the house. It’s especially popular in kitchens, bathrooms and foyers, but many homes use it in bedrooms and living areas as well. It’s extremely durable, easy to clean, and comes in a huge variety of colors and patterns. It’s also far more resistant to dirt and staining than carpet or solid wood floors.

There are so many ways to use tile to create a unique floor design, from creating a simple layout to incorporating intricate mosaics that highlight a focal point. You can even add texture to your floors with herringbone, basketweave or chevron patterns. There’s also no end to the ways you can mix and match tile styles, sizes, and colors to create a one-of-a-kind look.

Tile is often less expensive than other flooring materials. Its durability makes it a great choice for high traffic areas and rooms that receive a lot of water like bathrooms, laundry rooms and entryways. It’s also a good choice for families with kids or pets as it can withstand heavy foot traffic, spills and accidents without showing much wear.

Most tiles are made from natural clay and minerals, fired at extreme temperatures to make them tough and long-lasting. Because of this, they’re also environmentally friendly. They don’t release volatile organic compounds (VOCs) into the air like carpet or synthetic carpets do, and cleaning them is a breeze.

Unlike carpet, which requires special padding to absorb shock, tile is relatively soft underfoot and provides a cushioned feel. It’s also easier to keep clean and is a great option for people with allergies or respiratory issues. It doesn’t harbor dust, pollen, pet dander and other allergens like fabric can, and a quick vacuum removes the particles. Additionally, it’s easy to wipe down with a damp mop or cloth to keep it looking new. This is why buyers tend to favor tile over other types of flooring. They know that they can expect a high return on their investment when it’s time to sell.

Laminate

Laminate floors offer homeowners a stylish, tough and affordable alternative to natural materials such as wood or stone. They are constructed of multiple layers that are fused together and topped with a clear coat for durability. The result is a durable floor that is easy to clean and resists moisture, stains and scratches.

The base layer is usually made of a plastic resin to provide water resistance. The core is a thick inner layer of high density compressed wood fiberboard that provides strength and support. The decorative layer is a high quality printed image that gives the floor its look and can replicate the appearance of hardwood, stone or a variety of other designs. This layer is often backed by aluminum oxide and melamine to give it added strength and durability.

These layers are fused together with heat and pressure to form a solid piece of flooring. The planks lock together without the need for glue, allowing them to be installed over most existing subfloors, including concrete. They are also easy to repair if the need arises.

If you choose to install laminate over concrete, it is a good idea to use an underlayment that has an in-built damp proof membrane to prevent moisture and movement from damaging the flooring and the subfloor. It is also a good idea to lay a plastic barrier over the concrete to help keep moisture away from the flooring.

Like other types of flooring, you need to keep your laminate floors clean to maintain their beauty and extend their lifespan. You can use a mop and warm water to wipe the floors regularly. Then, make sure to dry the floors as quickly as possible to avoid moisture damage. It is also advisable to place doormats at entrances to stop sand and dirt particles from scratching the surface of the floor. Avoid using harsh scouring devices or cleaning products as these can wear down the surface of your laminate floors. If you do need to clean your laminate flooring, try a simple solution of warm water and vinegar.

Vinyl

Whether you’re looking for a flooring solution that can stand up to heavy foot traffic or something that’s resistant to moisture, vinyl is a good option. It comes in flexible sheets that can be cut to fit the floor area, and you can choose from an almost limitless number of patterns and styles – from timeless and realistic to more playful designs.

It’s also one of the most affordable flooring options on the market. For those with children or pets, it’s a great choice since the surface is easy to clean and can withstand spills and scratches. It’s even available in a range of different colours and patterns, so you can match it to your decor scheme.

Vinyl is also durable and long-lasting. It can last for 10 to 20 years or more, depending on the quality of the material and the thickness of the wear layer. It can resist scuffs and marks from furniture legs and cabinets, but you should still use furniture pads or place area rugs over your vinyl to protect it. If the room gets a lot of sunlight, you should opt for a vinyl with built-in UV protection to avoid discolouration over time.

While there are many reasons to love this versatile and hardwearing material, it’s important to keep in mind that vinyl is made with PVC – a petrochemical product derived from petroleum, which is a finite resource. It’s also made using a variety of chemicals during manufacturing and production, which can have a negative environmental impact and may affect your health through a process known as off-gassing (similar to that new car smell).

To reduce these concerns, you can look for vinyl products that are low in volatile organic compounds, or VOCs. These are the chemicals that emit into your home and cause a wide range of unpleasant symptoms, including headaches, nausea, dizziness, and long-term breathing issues. It’s also a good idea to consider how you’ll be installing your vinyl – a professional installation will help you get the best results from this tough material.

DIY Roof Maintenance Tips For Homeowners

A well-maintained roof protects the home and adds value. However, wear and tear can lead to leaks that need to be repaired promptly.

Roofing Corpus Christi TX is a highly specialized field and a lack of experience can result in costly mistakes. Additionally, some roofing materials have warranties that may be voided by DIY repairs.

diy roofing

Inspect Your Roof

Your roof is your home’s first line of defense against harsh weather conditions and should be inspected regularly. Proper roof maintenance helps preserve the condition and lifespan of your roofing materials while preventing costly repairs in the future. By performing a few simple tasks, such as conducting regular visual inspections, trimming overhanging branches, addressing leaks promptly, and keeping your roof clean, you can help extend the life of your roofing materials.

Visually inspect your roof at least twice a year, in the spring and fall. Look for signs of wear and tear, such as shingle damage or areas that are sagging. Also, check for piles of leaves or debris that can retain moisture and cause serious damage to your roof. Pay particular attention to any shingles that are curled, missing, or have lost significant granules. These shingles will allow water to seep into your home and may need to be replaced.

If you’re fit enough to do so, climb a ladder and visually inspect your gutters, chimney, and flashing on the roof. If you notice any cracked or loose bricks, it’s important to call a professional for repairs right away.

Homeowners should inspect the caulking around the chimney and vent pipes regularly. It’s a common source of leaks, and if the caulk is starting to lift, it needs to be scraped off and replaced with a new bead.

It’s also a good idea to clean the inside of your chimney regularly. This will help to prevent the buildup of creosote, which can cause a fire hazard. You should also clean out any unused fireplace vents regularly to remove the soot-like substance.

It’s also important to ensure your roof has proper ventilation. A well-ventilated roof will help to reduce shingle damage and keep your home cool and comfortable. Check that your attic vents are free of obstructions and open, and if you suspect any problems, contact a roofing Little Rock specialist for assistance.

Clean Your Gutters

Gutter systems play a critical role in preventing water damage to the roof and fascia. Water moves from the roof through the gutters to the downspout, where it is deposited away from the house. Clogged gutters lead to water backup that can erode shingles and cause wood to rot. Regular inspection and cleaning are key to preserving the life of your roof.

Gutters are prone to collecting dirt, animal feces, leaves, twigs, and other debris that can clog the gutter system. Cleaning your gutters on a schedule (two times per year is recommended) is important to prevent these clogs. It’s also essential to clean up the debris that is washed away when cleaning out your gutters and to make sure that your downspouts are clear of blockages.

Cleaning your gutters doesn’t have to be difficult or dangerous. You can use a ladder or hire a professional to do the work for you, but you can also clean your gutters with a hose from the ground. To do so, start by using a broom to sweep away any pine needles, leaves, or other debris that has accumulated near the gutters. Then, spray the hose into each section of the gutter to rinse out the trough and check that the downspouts are free of blockages.

Once you’ve cleared out one gutter section, move on to the next. Repeat the process until all of your gutters are cleaned out and inspected.

If you spot any algae or moss growing on your roof, it’s important to remove them before they become too established. You can do this with a solution made of equal parts water and bleach, or you can try a natural alternative such as hydrogen peroxide.

Additionally, it’s a good idea to trim tree branches that hang over the roof before they fall in severe weather conditions. Overgrown branches are more likely to break and fall on the roof, causing extensive and costly damage that may not be covered by your homeowner’s insurance policy. While you can do this yourself if the trees are low enough, a professional tree trimming service is often preferable for more challenging or high-up locations.

Remove Algae

Algae can turn roof shingles black and cause unsightly streaks that lower your home’s curb appeal. The spores that cause the discoloration are airborne and can be carried to your roof by rain, wind, or insects. It’s most common in coastal or humid climates. The most common type of algae that forms on a roof is gloeocapsa magma, which protects itself from the sun’s UV rays by producing a dark-pigmented sheath. The spores are harmless to humans and pets but can cause damage to shingles, causing them to crack or tear.

When algae spores get trapped under the shingles, it can cause rot and mold. Breathing in fungus or mold can cause numerous health issues including respiratory problems, asthma, nausea, and vision problems. If you have mold or mildew on your roof, it’s best to hire a professional to clean the area. If left untreated, the spores can continue to spread. If you do attempt to remove the fungus yourself, you must follow instructions carefully. Using the wrong cleaning solution or improperly removing the fungus can lead to expensive roof leaks and strip the shingles of their granules, resulting in unsightly bald spots.

You can use a bleach mixture on your roof to kill the fungus or mold and remove any moss. Mix equal parts water and bleach with a garden sprayer and apply it to the areas of your roof that are affected. Be sure to cover your garden below the roof, so that the solution doesn’t run off into your plants and kill them. After you have sprayed the roof, wait for about 30 minutes while the chemicals work their magic. Afterward, rinse the roof with water.

Another way to prevent the growth of moss or algae on your roof is to make sure that any overhanging branches are cut back and the roof is properly ventilated. It is also a good idea to install gutters that direct water away from the roof.

While DIY maintenance tasks like sweeping, cleaning gutters, and applying protective coatings can help you save money on your energy bills and extend the life of your roof, hiring a professional for more complex tasks such as algae removal is always a wise choice. A professional brings specialized equipment, experience, and expertise to the task, saving you both time and physical labor.

Remove Ice Dams

Ice dams are the result of melting snow that refreezes, forming an icy barrier on your roof. They are not only unsightly, but they can cause interior leaks. They also put the underlying shingles at risk of damage from the water pressure behind them. While preventing them is the best strategy, you should address any that have formed already so they don’t get worse.

The best way to remove an ice dam is with a roof steamer. However, this can require getting up on the roof—which isn’t advisable at the best of times. A safer and more effective solution is to use a telescoping roof snow rake, which you can find at hardware stores. These rakes have long handles that can extend up to 17 feet. You can safely use them from the ground, which is much more practical than trying to climb up on a slippery roof.

Another option is to use calcium chloride ice melt products. Be sure that you’re not using rock salt, which can damage your roof and surrounding shrubbery. Instead, purchase calcium chloride ice melt and fill a nylon stocking or tied-off tube sock with the product. Then, place the sock vertically over an ice dam, with one end sticking out over the gutter and downspout. Cover any plants and shrubbery with lightweight tarps for the duration that the calcium chloride is on the roof to prevent the liquid from damaging them.

Once the ice dam starts to melt, you can use a rubber mallet to break open channels in it and hasten its removal. This should be done carefully, to avoid displacing the surrounding snow. It may take several days for the ice dam to completely disappear, but if enough of it has been broken up, it will allow rainwater to flow through and off your roof.

An even better approach is to install electric ice-melting cables on the eaves of your roof. These cost between $1 to $6 per foot and heat up to keep the ice on your roof melted, so rainwater can flow freely down your gutters.

How Hardwood Floor Refinishing Can Bring New Life to Your Floors

Hardwood floor refinishing is a great way to breathe new life into your hardwood floors. It is a relatively simple process that can be done by yourself or with the help of a professional.

Hardwood Floor Refinishing

First, you will need to sand your hardwood floors. This process can be time-consuming and will likely take several days to complete.

When your hardwood floors begin looking dull, scratched and scuffed, refinishing is the best way to breathe new life into them. Refinishing is a process that involves sanding, staining and then re-applying a topcoat to protect your investment. Unlike resurfacing, which skips the sanding process altogether and simply reapplies a coat of new finish to the existing surface, refinishing requires that your floors be completely stripped down to bare wood before beginning.

To prepare the floor for refinishing, the first step is to remove all furniture from the room and cover any remaining items with plastic sheeting secured with painter’s tape to prevent dust from blowing onto other parts of your home. Next, the floor is sanded with either a drum or belt sander to remove the old finish and smooth the surface of the hardwood. It’s best to start with a coarse grit and then work your way up through the finer grits for a consistent finish.

Once the sanding is complete, vacuum the floors twice and use a tack rag to wipe down the entire area. It’s important to be extremely thorough here as any trace of dust left on your hardwood floors will be very visible once the new finish is applied.

Once your floors are completely clean and dry, you’ll need to choose a color or style of stain for your refinished hardwood floors. Be sure to discuss this with your refinishing contractor so they have an idea of what you want the floors to look like once finished. It’s also a good idea to test stains on a piece of scrap wood before starting the actual refinishing project.

Once the stain is dry, it’s time to apply your topcoat. The most common type of finish is polyurethane, which is a clear liquid that goes over the hardwood and creates a protective surface coating. Polyurethane comes in water-based and oil-based formulas. Water-based poly dries quicker but may show more imperfections, while oil-based poly dries slower but provides a very smooth finish. Both types of finishes can be buffed to a high shine, if desired.

Staining

After the sanding process is complete (which can take 2+ days depending on the size of your room) it’s time to stain. This is a great opportunity to give your floors a makeover and change their appearance entirely, and you have lots of options to choose from when it comes to color and sheen. Be sure to talk with your floor guys about what you’re looking for so they have samples to show you and can help you decide on the perfect finish. We highly recommend testing stains on actual wood so you can see how it will look in your home, especially since refinishing is a big decision and will impact your living space for years to come.

If you’re a DIYer, it’s possible to do the staining yourself, but keep in mind that this is a very messy job and will require a lot of patience. It’s also important to follow the instructions on the product you’re using carefully, especially when it comes to drying times. Once the stain has dried, you’ll need to vacuum and clean the surface again and then you’re ready for the last step of the refinishing process – applying the topcoat of protective polyurethane.

Polyurethane is a clear, plastic-like substance that goes over the hardwood and protects it from scratches and water damage. It’s the most popular choice for finishing floors, and it’s available in a variety of sheens, from matte to glossy. To apply it, simply use a pad applicator or paintbrush on your floor, working in small areas and rubbing with the grain of the wood as you go. You’ll need to allow time for each coat to dry, and you should sand between each application of polyurethane with a pole sander and 100-grit paper to smooth the surface and remove any imperfections.

Refinishing your hardwood floors is a big project, but it’s well worth the effort. It will help prolong the lifespan of your floors and give them a beautiful, rich sheen that will look fantastic in your home. It’s best to have this done every few years, although some people may be able to get away with just refinishing every five or six years.

Sealing

Hardwood floors can look beautiful, but they also need to be maintained. Refinishing is an important part of this maintenance, as it can keep your hardwood floors in good condition and help protect them from scratches and other damage. The refinishing process involves sanding the floor and then staining it with a new finish. It’s a labor-intensive process that can take days to complete, but it can be well worth the effort in the long run.

Before refinishing your wood floors, you’ll need to remove all furniture and trim from the room. This will allow you to see all of the work that needs to be done and ensure that it is finished properly. For the best results, it’s a good idea to hire a professional refinisher with experience in working with your specific type of flooring.

When refinishing your hardwood floors, you’ll need to sand the entire surface of the boards. This is a process that requires special equipment and can be very messy. You’ll want to start with the coarsest grit sandpaper and then move on to the finer grits. This will create a smooth surface for the next step of refinishing.

After sanding the floors, you’ll need to vacuum and tack cloth them. You’ll also need to replace base molding and quarter-round trim, as well as any vent covers. Once the floors are sanded and stained, you’ll need to let them dry completely before returning to the rooms.

Refinishing your hardwood floors is a project that will take time and patience, but it’s a crucial step in keeping them looking their best. This is a task that should be undertaken regularly, especially if you have a lot of people living in your home or frequent foot traffic. It can make the difference between beautiful, glossy floors and dingy, worn-out ones.

In addition to refinishing your hardwood floors, it’s also a good idea to consider resealing them. A simple sealer allows the natural color and grain of the wood to shine through, but it won’t provide much protection against stains and other damage. The most popular choice for resealing is polyurethane, which can be applied with a standard paintbrush and comes in a variety of finishes.

Installation

Hardwood flooring creates a warm, welcoming feel in any home. It’s also easy to maintain, durable and beautiful. If your hardwood floors are looking a bit drab, refinishing them will bring new life to your space. It’s important to choose a reputable professional to perform the work. This process is time consuming and requires patience, but the results are well worth it. Before starting, make sure you remove all furniture from the affected area. You should also take care to cover any trim or appliances with plastic sheeting to protect them from sanding dust.

The first step is to sand the hardwood floors. This will remove the old finish and smooth out any scratches or imperfections. The sanding can be done by hand or with a drum or belt sander. You’ll want to start with a coarse grit and move on to finer sandpaper to get a smooth finish. When finished, you should vacuum and wipe down the floor to remove any dust or dirt that could mar the final coating of stain.

Once the sanding and staining are completed, it’s time to install the new wood. Depending on your preference, you may choose to use an engineered wood system that is glued to the subfloor or a traditional solid hardwood. Engineered wood has a thinner wear layer than solid hardwood and is easier to refinish.

When installing the new floor, you will need to lay down a moisture barrier between the concrete slab and the hardwood. This will help prevent the wood from warping or buckling. You can purchase a premade moisture barrier from your local lumber store or you can build one yourself.

Lastly, you will need to put down a coat of polyurethane to seal the floors. The polyurethane will protect the wood from water and daily use, while adding a rich sheen. You can choose from a variety of sheens, ranging from matte (low luster) to high-gloss.

While refinishing and installation aren’t a DIY project, they can be done with minimal disruption to your home. Solid hardwood planks of at least 3/4 inch can be refinished four to six times over their lifetime. However, it’s best to refinish the floor less frequently than this, so that the wood is not exposed to too much moisture.

The Benefits of Hiring House Painters

House Painters Wilmington apply paints, stains, and wall coverings to new construction and remodeled homes. Their responsibilities also include surface preparation, such as applying putty and removing outlet covers.

When looking for a house painting contractor, consider their longevity in the business. Longevity indicates reliability and a commitment to developing efficient processes.

A freshly painted home can instantly spruce up your curb appeal and boost your home’s value. However, it’s not just about enhancing your property’s aesthetics – the right paint job protects against moisture, mold, and rot. This makes it a vital safeguard for your investment. If you’re looking to revitalize your living space or are planning to sell your home, working with professional house painters is an excellent option.

House painters are also skilled in the art of creating decorative finishes, such as textured walls and murals, that can add an artistic touch to any room. They can help you choose colors that speak to you and masterfully apply the paint with expert precision. You can also count on them to ensure that your walls are properly prepped before painting, including sanding, priming, and patching any damaged areas.

As spring approaches, many homeowners begin thinking about ways to breathe new life into their homes. Aside from replacing appliances and making repairs, house painting is one of the most cost-effective ways to improve your home’s overall appearance and functionality. Aside from boosting your home’s curb appeal, a quality paint job can help you feel more at ease in your own home and enhance the beauty of your garden.

In addition, a professionally-applied exterior coat of paint can help prevent damage from the elements and prolong the lifespan of your home’s siding, roof, and trim. It can even reduce your energy bills by lowering interior temperatures, as light-colored paints reflect more heat than dark-colored ones.

The best way to find a reliable house painter is by word-of-mouth or by using an online search engine. If you’re in the market for a new painter, be sure to compare quotes from different companies before making your decision. It’s also a good idea to discuss your expectations with the painters, so they have an understanding of what you want your home to look like and how you plan to use it. This will help avoid any misunderstandings and give you peace of mind that the job will be done to your satisfaction.

Reduce Prep Work

A good quality paint job can be the difference between a home that looks dated and worn and one that is vibrant and welcoming. However, most homeowners do not realize that a large percentage of a house painting job is the prep work.

For example, if you have to remove a textured ceiling and clean the mold or mildew staining, this can be a significant cost that is often overlooked in estimates. If you have to repair or replace drywall, this can also be a big expense. Likewise, if you want to commission a trompe l’oeil (trick of the eye) mural or other special painting, this can add significant costs.

The best way to keep these additional costs in check is to ask your house painter about the type of paint they will use and whether you can pick the color. They may also be able to offer discounts for volume purchases. This is especially true if you hire a house painter that has established relationships with local paint stores.

Another area where you can cut costs is by reducing the amount of preparation your house painter has to do before they begin. For example, if you have lots of knick-knacks or other decorative items on your shelves, it is best to put them away or cover them with a sheet before the crew starts working. This will minimize the risk of them getting damaged and will make it easier for your house painter to do their job.

If you have any fabric items in the room that is being painted, such as rugs and drapes, it is a good idea to take them down or roll them up and secure them with a cloth tie. This will prevent them from being damaged by the splatter and paint splashes that are inevitable during a house painting project.

The same goes for freestanding decorations and wall hangings. It is a good idea to move these items before the house painting crew arrives so they can focus on your walls and other surfaces. You might even consider putting your breakables in a storage facility for the duration of the painting job to ensure that they do not get lost or broken.

Save Money

While it may seem like hiring a professional is expensive, the truth is they’ll save you money in the long run. For one, painting is a labor-intensive job that takes a lot of time to learn. It also requires a large amount of equipment and paint to get started, making it cost-effective to let a professional take over. A well-trained house painter will be able to complete the task in half the time it would take you to do it yourself.

The other way that House painters can save you money is by using premium-quality paints that will last longer than standard paints and require less upkeep over the years. A reliable House painter will know exactly how much paint they’ll need to buy based on your walls’ dimensions and the number of coats you’re requesting. This prevents waste and ensures that you’re getting the most out of your purchase.

Additionally, a skilled House painter will be able to help you cut down on your electricity bills by suggesting color choices that will increase the natural light in your home, reducing your dependence on artificial lighting throughout the day. Plus, the professional will use caulking to seal any drafts around doors and windows that can contribute to higher energy bills.

If you want to save even more money, shop for your paint during select times of the year. Some stores offer special deals during the spring, and other companies may post coupons on their websites or social media accounts. You can also ask your House painter if they’re running any discounts.

Another thing to keep in mind when shopping for a House painter is that there are two types of costs to consider-direct and indirect. Direct costs include things like paint, labor, and gas for the work truck. Indirect costs are more general expenses, such as a monthly payment on the painter’s equipment and work truck, insurance, and part of their salary for support staff. Knowing the difference between these types of costs can help you understand why your estimate is higher or lower than expected.

Prevent Mold

House painters can help to prevent mold and mildew growth, particularly in areas with high moisture levels such as bathrooms and kitchens. Mold spores can feed on walls and other building materials, damaging their integrity and creating an unsightly appearance. Mold spores can also affect the health of those living in the home, with some studies suggesting a link between mold exposure and mental health issues.

Paint can provide a temporary solution to this problem, hiding the unsightly splotches and giving surfaces a refreshed look. However, if you have active mold or mildew spots, it’s important to remove the spores and treat the area with a diluted bleach solution (one part bleach, three parts water) to eliminate them and ensure that they won’t return. If the mold or mildew is severe, hiring a professional may be necessary to make sure that all of the spores are eliminated and that the affected material can be treated to prevent regrowth.

Many painting companies offer specialized services, including painting murals, faux paintings and other specialty finishes. Some of these can be very time-consuming, but they can also be a great way to add unique style and beauty to your home’s décor. A skilled and experienced house painter will be able to provide the necessary skills and tools to produce these finishes and can complete the job much faster than you would be able to do yourself.

Some painters may also have a special line of paints and primers that are designed to be mold-resistant. This type of paint can be used in shady outdoor areas where mold and mildew tend to grow, providing an extra line of defense against the fungus. However, the paint will only work if the mold and mildew are fully removed and the surface is completely dry before applying it.

While some people may choose to paint over mildew or mold, this is not recommended. The spores will continue to grow and will eventually eat away at the material of the wall system. In addition, mold spores can also spread throughout the home and cause other problems like structural damage and rot.

Choosing a Carpet Cleaning Service

You can rent carpet cleaners at supermarkets and big-box stores. Professionals have expensive equipment for hot-water extraction cleaning, which agitates and loosens dirt and stains from the fibers.

It’s important to vacuum and perform spot treatments on spills and stains to prevent them from becoming set-in, but regular deep cleaning of wall-to-wall carpet keeps them looking fresh. It also preserves manufacturer warranties and extends the life of the rug. Contact Carpet Cleaning Orem now!

When it comes to choosing a carpet cleaner, a little “home-work” on the front end can save you a lot of time, money and headaches down the road. It’s all about picking the right company the first time around to avoid paying for the same service twice. It only takes a few simple tips to make your choice, and you’ll be well on your way to crystal clean carpets without the hassle.

  1. Check customer reviews.

A simple Google search for the name of the company will give you a quick look at their reputation. If there are multiple negative reviews, it’s probably best to keep looking for a different company. However, if you find many positive reviews, it’s likely that the company is reliable and does good work.

  1. Ask the company about their pricing.

If you choose a company that offers three rooms for $99, it may be tempting to book that deal immediately. But be wary that this type of pricing is often a bait and switch. These companies lure you in with the low price and then try to up-sell you on more expensive services once they get inside your home. An honest carpet cleaning business will break down their prices over the phone and won’t have any hidden fees.

  1. Check the company’s insurance.

If something goes wrong during the cleaning process, it will be a relief to know that you’re covered. Make sure that the company you hire has liability and property damage insurance to protect you. Also, look for a company that clearly marks their vehicles so you can be sure they’re genuine before letting them into your home.

Another important tip is to find out if the company uses environmentally friendly chemicals. Some companies use harsh chemicals that can leave behind dirt-attracting residue and may even be hazardous to your family or pets. The better companies use green products that are safe for the environment and your family. If you see that a company only uses chemicals, be sure to ask how they will remove them completely after the job is done.

Preparation

Many people are surprised to learn that they need to do some prep work before their professional carpet cleaner arrives. They may think that this is a silly thing to ask of the professionals, but the truth is that they need some help to do their job as well as they can. It is important to clear the area around your carpets and rugs to avoid any sort of mess.

The process usually starts with pre-vacuuming to remove the majority of dirt and debris from the surface. This will also improve the effectiveness of any subsequent cleaning methods. In some cases, your carpet cleaner will apply a pre-treatment solution that loosens embedded dirt and stains. This solution is sometimes agitated with a brush for greater effect.

Once the pre-treatment is applied, it needs some time to set. This gives the technician a chance to work on any areas that they pointed out during their initial inspection. They may even use a stronger solution to treat particularly stubborn or deep stains.

It is also a good idea to move any bulky furniture to another location during this time. This will save you the hassle of having to rearrange your things afterward, and it will allow them to work more efficiently. Removing any furniture will also make it easier for the carpet to dry completely, which is a crucial step in getting the best results from the process.

Lastly, you will need to put away any valuables and breakable items. This includes fine china, glassware, and any other fragile items. These can get damaged or broken by the powerful cleaning equipment used in the process. It is important to secure them in a safe place before the carpet cleaners arrive.

It is also a good idea to discuss your cleaning preferences and any other issues that you have with the technicians before they begin. This can prevent any misunderstandings or disagreements that might occur once the cleaning is underway. In addition, you can also ask them any questions that you have about the process.

Cleaning

Carpet adds warmth and comfort to a home, but it requires routine cleaning to maintain appearance and sanitary conditions. Dirty carpets trap odours and germs, which can cause respiratory issues and can also contribute to the growth of mold. Professional carpet cleaners use advanced equipment to remove stains and deep dirt from the fibers. They use different processes to clean various types of carpeting, including hot water extraction, shampooing, and dry cleaning. They can also sanitize and deodorize the carpets to ensure they are healthy for children and pets.

The carpet cleaning process starts with preconditioning. This involves spraying an alkaline solution, such as an ammonia-based detergent for synthetic carpets or a mild acidic solution of dilute acetic acid for woollen carpets, onto the carpet. Then, the solution is agitated with a grooming brush or an automatic scrubbing machine. A pressurized manual or automated wand then passes over the surface to rinse away the preconditioner, residue, and particulates.

Homeowners can achieve similar results without renting a commercial steam cleaner by using a homemade solution and a scrub brush. Mix one part white vinegar with three parts water in a bucket or small container, dip the brush into the solution, and scrub. Work in a circular motion, and don’t fully saturate the carpeting. Scrub vigorously to lift and loosen stains and grime. After scrubbing, use dry towels to blot the area to remove excess moisture.

Another way to keep carpets in good condition is to vacuum daily. A powerful vacuum cleaner can reduce the build-up of dust, dirt, and other allergens that will damage and deteriorate the fabric over time. Changing the furnace filter frequently and having the ducts cleaned at least once a year will also help prevent dust and dirt from settling in and being blown into the carpeting.

Regular carpet cleaning will extend the life of the carpet and help it look newer for longer. Vacuuming twice a week, immediately treating spills and stains, and having the carpet professionally cleaned every six months will prevent permanent damage and make the carpets last much longer.

Drying

Once the carpet is cleaned, it must be dried properly to prevent mold and other issues. A professional carpet cleaner will use a moisture meter to ensure the area is completely dry before reinstalling the carpet, and can also use an infrared camera to find hidden moisture pockets in the structure or walls. You can help speed up the drying process by opening windows and running fans to create airflow throughout your home, which reduces humidity levels and speeds up the evaporation of water.

If your carpet is flooded, it is especially important to follow proper drying methods. Wet carpeting is an ideal breeding ground for mold, which can be aggravated by any wet cleaning process. You should also remove any furniture from the affected area to allow for proper air circulation and drying.

To begin the drying process, first vacuum up as much water as possible using a shop vac. You should also soak up excess water with towels and blot the area until they are saturated. Keep replacing the towels as needed, and be sure to blot both the surface of the carpet and the pad. After blotting, you can place fans around the affected area to increase airflow and speed up the drying process.

Depending on the source and purity of the water, it may be necessary to consult with a professional who is certified in water damage restoration. This can be especially true if you have Category 3 water, which is considered grossly unsanitary and contains harmful pathogens. When hiring a water restoration professional, look for one who is certified by the Carpet and Rug Institute (CRI), as this will ensure that they have access to equipment and products that the organization approves. It also helps maintain any warranty you have on your carpets.

There are many different drying methods used in the carpet cleaning industry, and the method you choose depends on the situation and the severity of the flooding. However, a few of the most popular drying processes include:

How to Become a Plumber

Plumber Cleveland Ohio are responsible for the installation and repair of pipes and plumbing appliances. They must be able to listen and understand customers’ concerns, diagnose problems, and fix them quickly and efficiently.

Those interested in becoming a plumber can get the necessary training through a trade school or through a formal apprenticeship program. They must also pass an exam to earn a license.

Plumbers are tradespeople who specialize in installing and maintaining systems used for potable water, hot-water production, sewage, and drainage in plumbing systems. They are patient individuals with a practical mind and manual dexterity, and work efficiently with great attention to detail. They are also skilled at troubleshooting and repair, and can resolve issues in a timely manner. Plumbers often work in homes, but they can also be found in factories and other industrial settings. Plumbers who focus on residential and commercial installations are known as service plumbers, while those who work on larger-scale plumbing projects in factories, offices, and other industrial settings are called maintenance or contract plumbers.

As a plumber, your duties are to install various materials such as kitchen or bathroom sinks and toilets, appliances, and more. You must be proficient at reading blueprints and architectural plans to know where to lay pipes, and you will need to have tools that can measure and cut pipe fittings. You will also need to have good customer service skills to interact with clients and explain technical issues in a way that is understandable.

Another job duty of a plumber is to inspect plumbing systems to identify problems or potential violations of building codes. This may involve using specialized equipment such as video cameras to inspect pipe conditions or pressure gauges to test for leaks. You may be responsible for repairing or replacing these devices as needed.

In addition to performing installation and inspection duties, a plumber may be required to perform repair services. These tasks could include opening clogged drains, replacing faucets and fixtures, and repairing or replacing toilets. You may also need to dismantle drywall or other structures to gain access to piping. Plumbers must have good physical strength to lift heavy parts and tools.

Your responsibilities may also include training other plumbers and coordinating with other workers on a project. It is important to communicate effectively, and you should be comfortable working with a variety of people from different cultures or backgrounds. You will also need to be able to follow instructions and complete basic math calculations.

Education and Training Requirements

A career as a plumber requires years of training and experience, and some jurisdictions require a license. Those interested in becoming plumbers can start the process by completing a vocational program at a local trade school or community college. The program will provide a basic understanding of plumbing principles and practices, including pipe systems, building codes, blueprint reading, and safety procedures. Many programs also include on-the-job training through an apprenticeship.

During their apprenticeship, aspiring plumbers will work closely with experienced journeyman plumbers and learn the ropes. The duration of the apprenticeship will vary, but aspiring plumbers should expect to spend at least two to five years in the field before they can apply for a master plumber license. During this time, they will need to pass written and practical exams to demonstrate their knowledge of the trade.

In addition to education and training, aspiring plumbers will need to have excellent customer service skills. They will often interact directly with clients, and they must be able to explain complex issues clearly and concisely. They must also be able to write clear and accurate estimates for their services. Moreover, they will need to be physically fit, as the job may require them to lift heavy equipment and work in tight spaces.

After completing their education and apprenticeship, aspiring plumbers should consider taking advanced courses in plumbing to prepare for the licensing exam. These courses are often offered at trade schools and community colleges, and they may cover topics such as green plumbing, advanced plumbing systems design, and the latest in technology. Plumbers can also choose to pursue specialized certifications in areas such as pipefitting and steam fitting, which will require additional coursework and training.

Applicants for a master plumber license must be at least 25 years old, have documented proof of work experience, and pass relevant examinations. They will also need to submit a background check report and pay any applicable fees. Depending on the jurisdiction, there may be additional requirements for plumbers who wish to become licensed, such as passing an interview and having a clean criminal record.

License Requirements

As with many other jobs, the qualifications you need to become a plumber depend on your locale. Most states have minimum work experience requirements and require that you pass an exam. You also need a license to practice in most areas of the country. This can be obtained by completing a vocational or trade school program, or through an apprenticeship program. You can also pursue a degree in the field from a university or community college.

You can learn more about the specific state licensing requirements by contacting your local plumbing association or state board of examiners. The United Association of Plumbers and Pipefitters offers a list of contact information by state. You may also be able to find information on the website of your local government.

Most aspiring plumbers start out as licensed apprentices. This allows them to get hands-on training while gaining valuable job experience. Some apprenticeships are sponsored by the state while others are private. Once you have completed your apprenticeship, you need to apply for a journeyman plumber license. This process usually includes submitting proof of 8,000 hours of practical work, sponsorship by a licensed master plumber and passing an exam.

If you want to become a master plumber, you need to have worked as a journeyman for a number of years and passed a state exam. Many plumbers join a trade association to receive additional training and certification in specialties like backflow prevention device testing. You can also take continuing education courses to maintain your license and stay up-to-date on new technologies in the plumbing industry.

In addition to the technical skills you need to be a plumber, customer service and communication skills are important. Since plumbers often deal directly with customers, they need to be able to listen to their concerns and explain complex issues clearly. They must also be able to troubleshoot problems and make repairs efficiently. The ability to remain calm under pressure is another necessary trait for this job. Generally, plumbers enjoy their careers and say that they do not regret entering this career.

Salary

Depending on the industry, experience and other factors, a plumber’s salary can range between $60,090 and $63,790. Many plumbers also belong to unions, which can influence their pay rates as well.

Typically, those who have received more education or training are paid higher wages. These may include those who have attended a trade school, completed online courses or apprenticed under a master plumber. Plumbers who possess specialized skills that are in demand often earn premium compensation, as well.

In addition, a plumber’s income can vary based on their location. For example, a plumber in San Francisco will typically make more money than one. This is largely due to the difference in the cost of living between the two cities.

Other factors that can affect a plumber’s income include their professional development and how they market themselves to potential clients. Those who invest in continuing education and keep their skills up to date will be better positioned for career advancement and can offer modern solutions to their customers. This can lead to a higher rate of client satisfaction, which ultimately results in greater earnings.

Plumbers can also increase their earning potential by expanding their service offerings. This may include offering emergency services or specializing in certain types of plumbing work, such as medical gas systems or luxury home installations. These supplemental services can help boost a plumber’s earnings potential and allow them to stand out from the competition.

As the demand for plumbers continues to grow, so does the need to attract and retain qualified candidates. Developing effective recruiting strategies can help a plumbing business attract the best talent and maintain a competitive edge in the field. This can include partnering with a job board to advertise positions, using social media to promote special offers and providing continuing education opportunities to ensure their employees stay up-to-date on the latest plumbing technology and methods.

It’s important for plumbers to find a job that they enjoy and can be proud of. With most Americans working into their retirement years, it’s important to choose a profession that is rewarding and provides a good work-life balance. A career as a plumber can provide just that, along with the financial benefits of a stable and lucrative job.

Connecting Your Plumbing

Plumbing involves the distribution of water and the removal of wastewater. It uses pipes, valves, fittings, and fixtures to convey fluids for drinking, cooking, heating, and washing.

Plumbers often work with contractors to manage large projects and may travel between sites. They also work with customers to understand their needs and provide advice. For more information, click the link https://holmes-plumbing.com/ provided to proceed.

Pipes

Pipes and tubes convey water and other liquids and gases across long and short distances in a wide variety of industrial, commercial, and residential settings. Both pipes and tubing convey fluids under pressure, but the term pipe usually carries more of a structural connotation than the term tubing.

Different types of pipe are used for different purposes. Rigid copper, also known as hard copper, is commonly used for supply lines to faucets. Flexible copper, also called soft copper, is often used for shorter runs, such as in corners or under a sink. Other kinds of pipes include steel, cast iron, galvanized steel, ductile iron, stainless steel, and lead. Pipes made of other materials are often used in specific applications, such as for sewage or water mains.

In the United States, iron pipes are identified by their nominal size and wall thickness, or schedule. For example, a 1/2 inch iron pipe has an inner diameter of half an inch, but the outside diameter may be larger or smaller than that depending on the pipe’s use. Copper plumbing tube, on the other hand, is sized according to its actual outside diameter and wall thickness, rather than by its nominal size. This system is more commonly referred to as Copper Tube Size (CTS), and it uses a different sizing standard from the old Iron Pipe Size (IPS) system.

Other countries use different systems for piping identification. In the United Kingdom, for instance, copper piping is standardized by a system that names it according to its wall thickness rather than its inside diameter. In addition, it is categorized into types based on the type of installation it will serve. For example, Type K copper piping is designed to be buried underground, while type L copper piping is suitable for indoor use such as kitchen and bathroom hot and cold supply lines.

Fittings

There are a wide variety of fittings available to help you connect your plumbing. These include couplings, elbows, tees, unions and valves. Each serves a different purpose. Some are used to connect pipes of the same size while others are designed to join pipes of different sizes, change the direction of a pipe run, and extend a system by branching. These fittings can be made from a number of materials, including PVC, CPVC, copper, brass, galvanized steel and chrome-plated brass.

Couplings (also known as reducing couplings or reducers) reduce the diameter of two pipes to allow them to fit together. These are often used to repair damaged long pipes. There are two types of these couplings: regular and slip. The regular type has a small ridge or stops internally to prevent over-insertion of one of the pipe segments and thus, under-insertion of the other (which would create an unreliable connection).

An elbow is a type of pipe fitting that bends inward or outward from a horizontal line at a 45 degree angle. This is useful for reducing turbulence and the deposition of entrained solids in water flow. These are typically made from acrylonitrile butadiene styrene (ABS plastic), polyvinyl chloride (PVC) or chlorinated polyvinyl chloride (CPVC).

A tee is a plumbing fitting in the shape of the letter T. It combines or divides fluid flow from three inlets into two outlets. This type of fitting is available in a wide range of materials and in both equal and unequal variants.

A union is a type of plumbing fitting that can be joined to pipes that are made from different materials and are unable to be connected using other methods. A union is similar to a coupling, but it can be taken apart if necessary.

Fixtures

Plumbing fixtures are appliances that connect to the pipes in a home or commercial building to supply water and remove waste. They include sinks, toilets, bathtubs and shower receptors, faucets, garbage disposals, water valves, and more.

The most common fixture in any house is a sink, which is usually installed in the kitchen or bathroom. Sinks come in a wide variety of sizes, materials and styles to match any design style. They are also available in different finishes, such as matte black, oil rubbed bronze and stainless steel, to complement any decor.

Other common plumbing fixtures include toilets, which are primarily used to dispose of human waste and come in a wide range of designs and colors to meet any preference or décor. Bathtubs are also a popular plumbing fixture, which can be found in many different shapes and sizes to fit any space or preference. These tubs can also have built-in jets and adjustable water flow to create a relaxing spa experience.

A garbage disposal is another important plumbing fixture, which is usually located under a kitchen sink and helps to dispose of food scraps and other non-liquid waste. Backflow preventers are another key plumbing fixture that helps to protect the integrity of a building’s water supply and ensures that no contaminants enter the drinking water.

The last important type of plumbing fixture is a water heater, which heats and stores water to provide hot water for washing and cooking. These devices can be gas-powered or electric and are a necessary part of any household or business. Plumbing fixtures can be replaced or upgraded for a variety of reasons, including wear and tear, a desire to change the look or feel of a room, or problems with functionality.

Sewer

In modern urban areas, sewer systems collect and dispose of waste water. They prevent stagnation and flooding by transferring stormwater, wastewater, and sewage to designated areas where they can be treated before being piped back into the environment. They also allow groundwater to reclaim land that would otherwise be too dense for agriculture and other uses.

Sewers are typically underground, with openings on the surface for access or inspection. They may be separate from a house’s piping system, or they may connect directly. Those that connect to household drains must be inspected regularly for inappropriate connections, which can result in clogs and other problems. A qualified plumber can use modern HD sewer tools to get a clear look at your system and detect issues such as biogenic sulfide corrosion.

House sewer pipes convey anything that’s classified as solid waste or grey water waste from household appliances to a public or private sewage treatment system such as a septic tank. This can include the water and waste from toilets, washbasins, and dishwashers. It can also include discharge from air conditioners, coil coolers, and in-line humidifiers.

These pipes are made of a variety of materials, including cast iron, galvanized steel, PVC plastic, ABS plastic, and vitrified clay. They can be either horizontal or vertical and may have a smooth or rough surface. A smooth surface allows for easy flow of water and reduces the chance of a blockage.

If your home’s sewer line is blocked, you should call a qualified plumbing professional immediately. A clogged house sewer can be very unpleasant and expensive to deal with. It can lead to a flood in your basement and even in the upper floors of your home. To avoid this, keep trees and shrubs away from your home’s sewer line and install a clean-out. This will give you an accessible point for professional drain cleaners to reach your clogged pipes and give them a better chance of being cleared.

Water heater

A water heater takes cold incoming water and indirectly warms it using gas burners or electric heating rods. When hot water is needed, a thermostat tells the heater to send the warmed water through the pipes and into your shower or sink. A drain valve is also located on the tank to easily empty the hot water tank of sediment when necessary.

Water pipes are connected to the water heater by copper or stainless steel flexible connectors that screw onto nipples on the outside of the tank. Typically, they are sold in pre-cut lengths that fit most common homes. The connectors are equipped with dielectric fittings that prevent metal from coming into contact with metal and potentially creating a pinhole leak. The pipe connections should be insulated to keep hot water pipes from cooling down too quickly, and they should slope away from the water heater to facilitate easy water flow.

Install a drain pan underneath the water heater when you’re installing it in an indoor space to protect your floor and walls from any leaks or spills. If you’re putting in a gas or oil water heater, be sure to locate it in the garage so that it doesn’t accidentally ignite gasoline vapors or combustible materials in your living area.

Install a shut-off valve on the cold water line on the supply side of your home near the water heater so you can turn off the water to your tank in case of an emergency. A pressure relief valve should also be installed on the water line to the water heater to protect it from over-pressurization, which can damage the tank. A drain valve is not a part of your water heater’s normal operation, but it’s important to have one installed so that you can easily drain the tank when cleaning or removing sediment.

The Role Of Insulation In Green Building Design

Insulation is an integral part of green building design, providing energy savings and reducing greenhouse gas emissions. It also helps with temperature regulation, sound control, and moisture control.

A green Perth Insulation company can provide sustainable options that are derived from recycled or renewable materials. These eco-friendly options meet green standards that are used in rating tools such as LEED.

insulation

Energy Efficiency

The primary function of insulation is to limit the movement of temperature. This reduces energy consumption, which in turn minimizes the carbon footprint of a building. Insulation reduces the flow of heat in the winter, and prevents a surplus of heat in summer, keeping the indoor air at a comfortable temperature without excessive energy use.

Insulation is also useful for reducing condensation and other moisture problems. It is important to choose the right type of insulation for a specific climate. Incorrect choices can lead to the growth of mold or other problems, which may damage a building’s interior and cause health issues for those living inside the structure.

Typically, a higher R-value is associated with better insulation performance. The R-value rating describes how well a material resists the flow of heat between spaces in a building’s shell. R-values are listed for roof and ceiling assemblies, walls, and floors. Choosing the right R-value for your home will depend on your region’s climate and the thickness of existing insulation.

When selecting insulation for green buildings, look for materials that have low embodied energy. This includes the energy consumed to produce the insulation, as well as the amount of carbon dioxide released during manufacturing. Insulation made of polyurethane, for example, uses fewer fossil fuels during production and is more environmentally friendly than other materials such as fiberglass.

While the path to a sustainable future may seem daunting at times, it is important to try and save energy as much as possible. This is one of the easiest and most effective ways to lower your energy consumption.

Incorporating high-performance insulation during new construction is the best way to achieve energy efficiency, but it can also be an effective retrofit in older homes. It is important to consult with an insulation contractor in your area to determine the right R-value for your home’s climate and ensure that the product is installed correctly to maximize energy savings. A professional can help you make the most of your energy savings and increase the value of your home, as well.

Indoor Air Quality

The health and well-being of building occupants are a crucial part of green building design. Insulation is a key component of this because it helps to prevent air leakage and thereby ensures that the building is well-ventilated. This in turn reduces condensation, mold growth, and other indoor pollutants, ensuring that the air is clean and healthy for occupants.

Insulation is a good choice for people with respiratory issues because it acts as a barrier against harmful contaminants that can cause allergies and asthma. Furthermore, insulation can help to keep the temperature in a home or building stable and thereby reduce the need for excessive heating or cooling, saving energy costs.

In addition, insulation can contribute to meeting the requirements for certain energy-efficiency tax credits (for homeowners and builders) based on the reduction of energy use. It can also help to minimize greenhouse gas emissions.

Whether it’s sweltering hot or bitterly cold outside, insulation is the perfect barrier to protect buildings from temperature fluctuations, helping to save on energy costs and create a comfortable indoor environment all year round. This can also reduce the strain on heating and cooling systems, helping to prolong their lifespans.

Insulation can be made from a range of materials, but fiberglass is the most common type used in residential properties. This is because it’s very familiar to most homeowners and because it’s a relatively cheap material. However, it’s important to note that the current trend is for insulation to be made from cellulose, which is more environmentally friendly and has better performance than fiberglass in several ways.

Cellulose insulation is a great choice for new construction, open framing applications, and for those who want to take a more sustainable approach to the build. It has superior energy-efficiency, and sound-absorbing properties and is long-lasting compared to fiberglass. It is also available in different thicknesses, making it suitable for a wide variety of projects. For instance, cellulose can be used under floorboards and in vertical knee-wall sections of an attic. It can also be installed around electrical cables, preventing short circuits and electric shock.

Health & Safety

Insulation slows the flow of heat, helping to keep homes warm in winter and cool in summer. It’s a key component of passive design and is essential in reducing heating and cooling costs, as well as greenhouse gas emissions.

The ability of insulation to resist the flow of heat depends on its thermal resistance or R-value. The higher the R-value, the more effective it is. It also depends on how the insulation is installed. For example, it must be fitted tightly around studs and joists to achieve its full R-value. Using different materials in a home’s construction, as well as proper orientation, also affects its performance.

Several types and forms of insulation are used to prevent the transmission of heat, electricity, sound, or light. They are often referred to as insulators and can be made of paper, glass, ceramics, metals, or plastics.

Most commonly, insulators are used in residential and commercial buildings to prevent the transfer of heat between inside and outside the building, as well as reducing energy consumption. They are available in various thicknesses and both foam-in-place and loose-fill insulation formats. In some cases, the insulating material is combined with a reflective surface to provide additional benefits such as preventing solar heat gain or controlling sunlight penetration.

Another important function of insulators is to prevent the passage of electricity between electrical conductors, which can be dangerous to humans. They are typically referred to as electrical insulators and can be in the form of wire wraps, cable sleeves, or even insulating supports for electric power distribution and transmission lines on utility poles and towers.

Several factors can cause an insulator to fail, including its physical damage, aging, improper installation, or contamination. Insulators are typically designed to withstand a specified voltage, known as the flashover voltage, before failing.

When selecting insulating products for your home, it’s worth considering the environmental impacts of the product and how easily it can be recycled after use.

Environmental Impact

Insulation reduces the amount of energy required to heat or cool a building, significantly reducing energy consumption and mitigating climate change impacts. This decrease in energy demand also reduces the strain on heating and cooling systems, increasing their lifespan and efficiency. Furthermore, insulation materials have sound-absorbing properties that create a quieter indoor environment. In addition, insulation eliminates drafts and helps prevent condensation and mold growth, further enhancing indoor comfort.

In the context of energy poverty and high energy costs, the implementation of insulation in new buildings is becoming increasingly important to achieve a greener, more sustainable future. Likewise, existing buildings with poor insulation present a great opportunity for sustainable renovations to improve their energy efficiency.

Proper insulation is a key component of any green building and offers many environmental benefits, from reducing carbon footprints to improving indoor air quality. The insulating material acts as a barrier against external temperature fluctuations, keeping a comfortable internal environment year-round, with minimal energy requirements. It also eliminates drafts and provides a quieter environment, thus improving productivity and performance.

The use of natural or renewable insulating materials is another potential way to reduce environmental impact. To better understand the sustainability of insulation, various Life Cycle Assessments (LCA) have been performed for conventional and green alternatives. In terms of market-leading insulation materials, stone wool, glass wool, EPS, and XPS have comparable results in most LCA studies. The organic non-renewable materials cork, cellulose, and hemp show less favorable results. These results may be partially due to different l and r specifications used in the different studies. In addition, the choice of binders and additives has a considerable influence on the environmental impact of insulation.

The most positive result is found in the case of renewable insulation materials, which have lower greenhouse gas emissions than their conventional counterparts. This is especially true for cellulose and hemp, which are more eco-friendly than the market-leading materials stone wool and glass wool. Furthermore, they have the highest LCA scores of all the analyzed materials with a low land-use change impact.

Liquid Waste Disposal

Liquid Waste Disposal Perth can be a hazardous material if not properly disposed of. This waste requires special treatment and disposal processes to ensure safety and environmental protection.

Households, commercial and industrial establishments generate a lot of liquid waste materials. These liquid wastes can cause negative social and economic impacts if not managed properly.

Virtually every organization and human activity generates waste of some kind, whether solid, liquid or gaseous. Some of these wastes, like sewage sludge and other organic matter from water treatment plants, are classified as hazardous. However, many types of liquid waste do not pose the same level of risk to humans and wildlife as these hazardous wastes.

The type of waste your facility produces will determine the methods you use for disposal. This is particularly true for hazardous liquid waste, which may require special handling and disposal techniques. Proper storage is also essential to reduce the chances of spills or leaks that could jeopardize the health and safety of staff or the public.

Several different kinds of liquid waste exist, including septic tank waste, industrial wastewater, cooling water and used oil. This waste is generated by commercial, residential and agricultural sources. It is important to evaluate each of these waste types to ensure that the proper disposal methods are employed.

Before the waste is disposed of, it usually goes through a treatment process to remove any solids. This can be done using physical or chemical processes. Physical methods include screening, which involves passing the liquid through a filter to remove large debris from the waste stream. Chemical treatments, on the other hand, involve adding specific chemicals to the liquid to change its physical properties. The goal of this step is to make the waste more soluble so that it can be easily drained and disposed of.

Another consideration when deciding on the best method for disposing of liquid waste is its proximity to surface and groundwater. For example, if your waste is disposed of too close to a well water source, the water can be contaminated by runoff from your site and pose a threat to human health. The same is true for surface water sources, as leaking waste can cause contaminant runoff to flow into rivers and lakes, posing serious environmental concerns.

Your disposal site should be positioned away from any bodies of water, even those that are not in your immediate area. This is because a leak from your disposal site can cause contaminated runoff to flow into those water sources and harm the environment and the local population.

Irregularly disposing of liquid waste creates a variety of environmental, health and safety risks. When the waste is disposed of improperly, it can spill into waterways, pollute groundwater aquifers and even affect drinking water supplies. The chemicals and harmful pathogens present in the liquid waste can also harm human beings.

If the liquid waste is hazardous, you need to work with a professional disposal company that understands the regulations. The waste company will help you decide whether your liquid waste is classified as water waste or special waste and follow the appropriate guidelines for safe and responsible disposal.

Liquid wastes can be hazardous for various reasons, including ignitability, corrosivity, toxicology and reactivity. In addition, some wastes can have additional hazards that are based on how they react with other substances. These characteristics can trigger chemical reactions that lead to fires or explosions, give off gases and vapors, or poison the environment.

Some examples of ignitable wastes include combustible oil, chemicals and solvents. To figure out if a waste has the ignitability characteristic, a number of tests can be done. Corrosive wastes are materials that corrode metal containers like drums, storage tanks and barrels. To test if a waste has this characteristic, different EPA methods can be used. Toxic wastes are substances that poison people and animals in large amounts or small quantities. They may have acute effects that kill or harm the individual immediately, or chronic effects, such as causing cancer and other diseases after long periods of exposure. Some toxic wastes are carcinogenic and mutagenic, which means they can cause major biological changes in offspring.

Toxic wastes that leach into groundwater can threaten the quality of drinking water sources. To avoid this, liquid waste should be stored and disposed of in areas that are separated from other types of solid or liquid wastes. You can use barriers such as physical separation, segregation and the use of color-coded or labeled containers to separate toxic, corrosive and non-hazardous wastes.

Liquid wastes can be incinerated to reduce their volume and destroy harmful pathogens. However, this is a difficult method that releases greenhouse gases into the atmosphere and can exacerbate respiratory conditions. Another option is deep-well injection, which involves injecting the waste into underground wells. However, this technique requires suitable geological conditions and is not ideal for all liquid wastes.

Regardless of where and how liquid waste is generated, there are significant hazards associated with its disposal. Chemicals in the form of liquids can pollute and contaminate soil and water sources, harming or killing wildlife. These chemicals can also enter the food chain and make its way to human consumers, posing long-term health risks.

Liquid chemical waste can also be a fire hazard, as well as corrosive and infectious. Ignitable chemical waste can explode when exposed to air or flame, while corrosive waste can eat through solid material and destroy living tissue upon contact. Some corrosive and ignitable wastes are toxic, even in small amounts, while others are carcinogenic or mutagenic.

The type of liquid waste and its disposal methods are both crucial to environmental safety. For example, ocean dumping is not a good practice due to potential harm to marine ecosystems. On the other hand, combusting liquid waste at high temperatures helps to reduce its volume and destroys harmful pathogens, but this method requires proper management to ensure that the resulting residue is safe for disposal.

In addition to these disposal methods, recycling and reuse can also help protect the environment from hazardous wastes. For instance, returning empty chemical containers for refilling and reusing gas cylinders can greatly reduce the amount of chemical waste generated.

When disposing of large quantities of liquid chemical waste, it is important to call on a professional waste management company. These companies specialize in collecting and transporting liquid waste, providing an environmentally friendly solution that complies with all regulations.

Aside from the environmental effects of improper waste disposal, there are also hazards to workers. For example, workers who are not properly trained in handling and disposing of hazardous waste may suffer from burns or breathing problems. In addition, spilled or leaking liquid waste can be a health hazard for first responders, as it can contain bacteria such as antibiotic-resistant E. coli.

When not disposed of properly, liquid waste can contaminate water sources such as rivers, lakes, and groundwater. This water can disrupt ecosystems and harm aquatic life, as well as pose a threat to drinking water supplies. In addition, contaminated soil can contaminate the food supply and cause long-term health risks for humans and animals.

Insufficient and ineffective liquid waste disposal can lead to environmental damage that is detrimental to the health of humans, plants and animals. Chemical pollutants from the improperly disposed of liquid waste can contaminate soil and water sources, disrupt ecosystems and harm wildlife and aquatic life. If contaminated water enters our food chain, it can also lead to serious long-term health problems for people. Liquid waste can also release toxic gases into the air when it is improperly disposed of, which can have negative effects on our environment and human health.

The most important factor in the environmental impact of liquid waste is the type of chemical contaminants found in it. This is why it is critical to identify and classify liquid non-hazardous waste appropriately before disposing of it. There are several clean disposal methods for such wastes, including composting, which turns the non-hazardous liquid waste into organic material that can be used as fertilizer. This is a great way to protect the environment and human health while reducing landfill volumes.

Another clean disposal method is incineration, which sees the liquid non-hazardous waste subjected to scorching temperatures inside specialised furnaces until it is reduced to ash and gases. This is a great way to protect human and animal health while ensuring that the ash and gases are properly disposed of. For hazardous liquid wastes, advanced treatment methods may be required to reduce their toxicity levels even further.

Businesses that generate large amounts of liquid waste should take extra care to ensure that the waste is disposed of in accordance with environmental regulations. This is because failure to comply with such laws could lead to heavy fines or legal penalties.

Besides affecting the environment, improper liquid waste disposal can also cause aesthetic issues for nearby residential areas. For instance, it can produce an unpleasant odor that is likely to upset the neighbors. In addition, it can affect the quality of residential water supplies due to contamination.